Github
What is Version Control?
Version control is a system that records changes to files over time so you can look back at old versions and recover if something goes wrong.
Why it’s necessary:
- Without it, people often make multiple copies of the same project:
project_final.doc,project_final_v2.doc,project_final_really_final.doc - Mistakes happen — code breaks, files get deleted — and without version control, it’s hard to go back.
- Makes team projects easier by keeping everyone’s work in sync.
Google Docs analogy:
Think of Git as Google Docs version history for code:
- Google Docs automatically saves every change and lets you roll back to any point in time.
- You can see who made each change.
- Version control does the same thing, but for code projects.
Takeaway:
Version control = a time machine for your projects.
What is Git?
- Git is a version control system used by developers to track changes and manage project history.
- Works locally on your computer (no internet required).
- Stores everything in a hidden folder called
.git. - Lets you create branches to experiment and merge changes when ready.
Takeaway:
Git = the tool that powers version control.
What is GitHub?
- GitHub is an online platform that stores Git repositories in the cloud.
- A repository (repo) is a project folder with your files and full history.
- GitHub adds collaboration features:
- Pull Requests (propose changes)
- Issues (track bugs and tasks)
- Project boards (organize work)
- Think of it as Google Drive for Git projects, built for developers.
Takeaway:
GitHub = a place to host Git projects online and collaborate.
Remote vs Local Repositories
Understanding the difference between local and remote repositories is crucial for Git workflow:
Local Repository
- Location: On your computer (your laptop/desktop)
- Access: Only you can access it directly
- Speed: Very fast - no internet required for most operations
- Contains: Your working files + full Git history in the
.gitfolder - Operations:
git add,git commit,git branch,git logall work locally
Remote Repository
- Location: On a server (like GitHub, GitLab, etc.)
- Access: Can be accessed by multiple people
- Speed: Requires internet connection
- Purpose: Central place for team collaboration and backup
- Operations:
git push,git pull,git fetchinteract with remotes
The Connection
Your Computer (Local)     ←→     GitHub (Remote)
┌─────────────────────┐          ┌─────────────────────┐
│ Working Directory   │          │                     │
│ ├── file1.js        │   push   │   Repository        │
│ ├── file2.css       │   ────→  │   ├── file1.js      │
│ └── ...             │          │   ├── file2.css     │
│                     │   pull   │   └── ...           │
│ Git History (.git)  │   ←────  │                     │
└─────────────────────┘          └─────────────────────┘
Typical Workflow:
- Work locally - edit files, make commits
- Push to remote - share your changes with the team
- Pull from remote - get teammates' changes
- Repeat - continuous collaboration cycle
Key insight: You have a complete copy of the entire project history on your local machine. You can work offline and sync up later!
Why is Any of This Important?
Using Git and GitHub during a hackathon is crucial because:
- Prevents Lost Work: No more overwriting each other's files or losing track of the latest version—Git keeps a full history and lets you roll back mistakes.
- Enables Real Collaboration: Multiple people can work on the same project at once, even on different features, without interfering with each other.
- Reduces Merge Chaos: Git helps combine everyone's changes smoothly, instead of manually copying and pasting code (which often leads to errors).
- Professional Workflow: Using Git/GitHub is the industry standard—learning it at a hackathon prepares you for real-world teamwork.
Bottom line: Git and GitHub keep your team organized, efficient, and focused on building, not fixing file messes.
How to Install Git
You can find out how to install Git here
How to Setup Git
After installing Git, you need to configure it with your identity. This information will be attached to every commit you make.
Configure Your Name and Email
git config --global user.name "Your Full Name"
git config --global user.email "[email protected]"
Important: Use the same email address that you use for your GitHub account. This ensures your commits are properly linked to your GitHub profile.
Verify Your Configuration
Check that your settings were saved correctly:
git config --global user.name
git config --global user.email
Why this matters:
- Your name and email appear in the commit history
- Proper configuration ensures your contributions are tracked correctly
- These settings only need to be done once per computer
How to Create a GitHub Repository
Creating a repository on GitHub is the first step to hosting your project online and collaborating with others. Here's a step-by-step guide:
Step 1: Sign in to GitHub
Make sure you're signed in to your GitHub account at github.com. If you don't have an account, create one first.
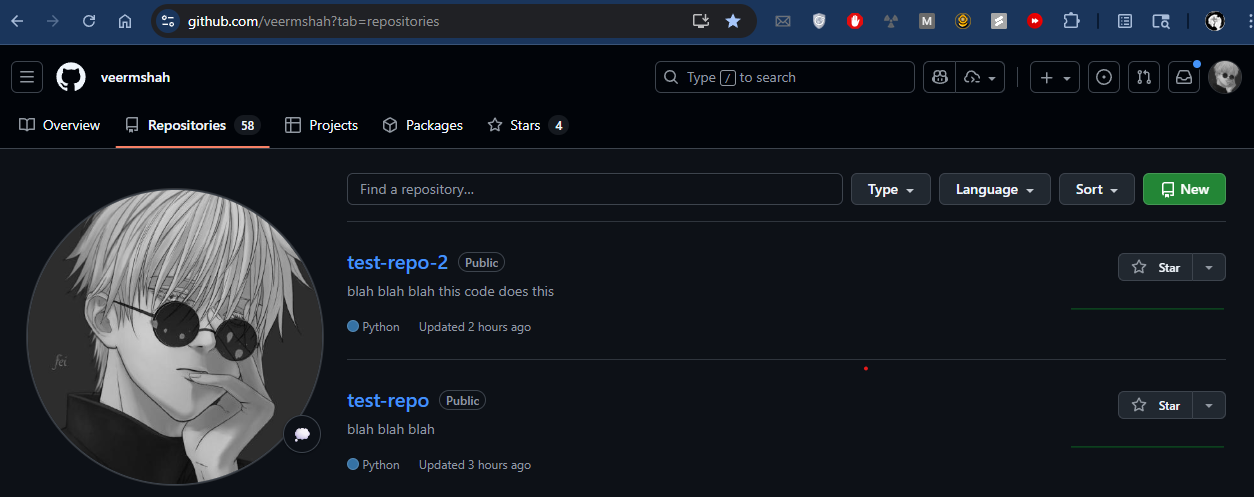
Step 2: Create a New Repository
- Go to the Repositories by clicking on your profile picture and clicking "Repositories"
- Click the Green "New" button
Step 3: Configure Your Repository
Fill out the repository creation form:

Repository Details:
- Repository name: Choose a descriptive name (e.g.,
my-hackathon-project) - Description (optional): Brief explanation of what your project does
- Visibility:
- Public: Anyone can see this repository (recommended for open source)
- Private: Only you and collaborators can see it
Initialize Repository:
- ☑️ Add a README file: Creates a README.md file (recommended)
- ☑️ Add .gitignore: Select a template for your programming language
- ☑️ Choose a license: Select an open source license (optional)
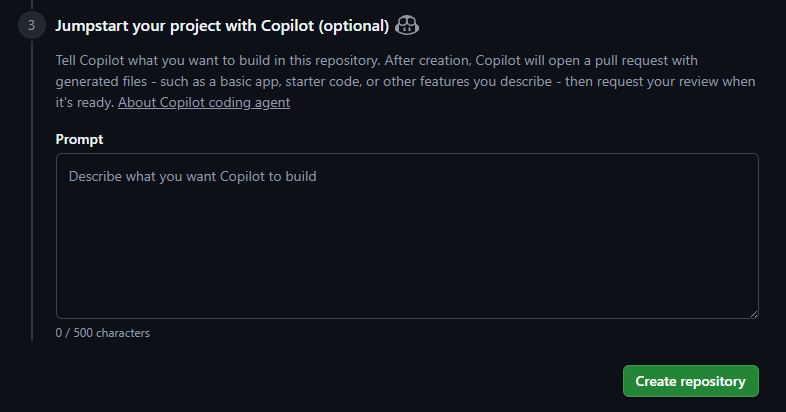
Step 4: Click "Create Repository"
Click the green "Create repository" button to create your new repository.
Step 5: Your New Repository
Congratulations! You now have a new GitHub repository. You'll see:
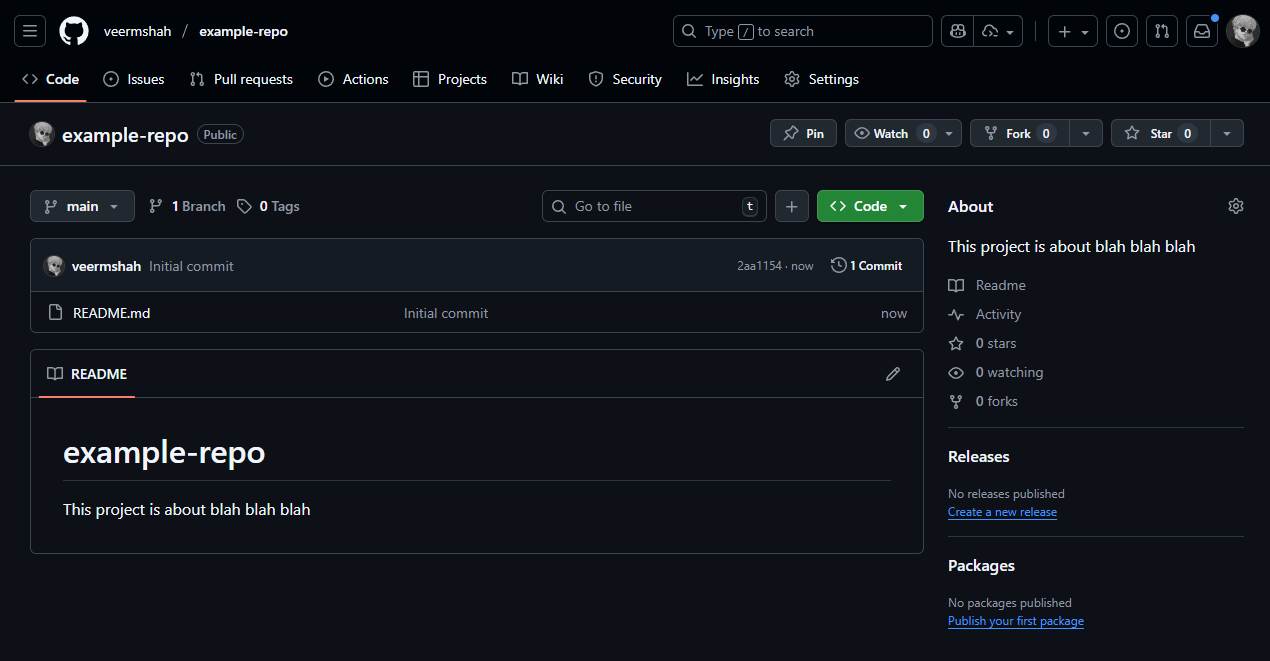
- Repository URL:
https://github.com/yourusername/repository-name - Clone URL: Use this to download the repository to your computer
- Files: README.md, .gitignore, and LICENSE files if you selected them
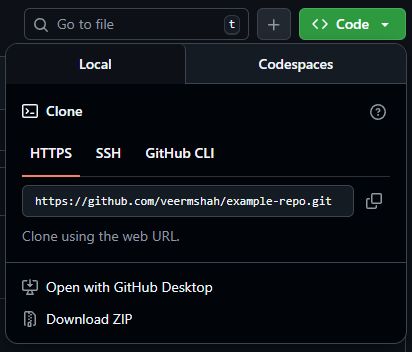
Step 6: Clone Your Repository Locally
To start working on your project locally, copy the repository to your computer:
- Click the green "Code" button
- Copy the HTTPS URL
- Open your terminal/command prompt
- Run the clone command:
git clone https://github.com/yourusername/repository-name.git
cd repository-name
Alternative: Create Repository from Existing Project
If you already have a project folder on your computer:
- Create the repository on GitHub (Steps 1-4 above) without initializing files
- In your project folder, run these commands:
git init
git add .
git commit -m "Initial commit"
git branch -M main
git remote add origin https://github.com/yourusername/repository-name.git
git push -u origin main
Tips for Repository Creation:
- Use descriptive names:
weather-appinstead ofproject1 - Add a README: Helps others understand your project
- Choose appropriate .gitignore: Prevents unnecessary files from being tracked
- Make it public: Great for showcasing your work to employers
- Add collaborators: Go to Settings → Manage access to add team members
Local Repo
git clone
- Use when you want to download an existing repository from GitHub (or another remote).
- Example:
git clone https://github.com/user/repo.git
git init
mkdir my-project    # Makes a new folder
cd my-project       # Changes directory (CD) to new folder
git init            # Creates a hidden .git folder that Git uses to track changes
Cloning vs Forking
- Cloning: Makes a local copy of a repository. You can push changes if you have permission.
- Forking: Creates a personal copy of a repository on GitHub under your account. Often used when contributing to someone else’s project.
Typical workflow
- To contribute to an open-source project: fork → clone your fork → make changes → open a pull request.
- To get a local copy for your own use: clone directly.
Tracking Files
git status
Shows the current state of your working directory and staging area:
git status
What it shows:
- Untracked files (new files Git doesn't know about)
- Modified files (changes not yet staged)
- Staged files (changes ready to commit)
- Current branch and sync status with remote
git add
Stages files for the next commit (tells Git which changes to include):
git add filename.txt        # Add a specific file
git add .                   # Add all changes in current directory
git add *.js                # Add all JavaScript files
git add -A                  # Add all changes in the entire repository
Think of it as: Putting items in a shopping cart before checkout.
What is a Commit?
A commit is like a snapshot of your project at a specific point in time. Think of it as:
- A save point in a video game - you can always return to this exact state
- A photo of all your files at that moment
- A checkpoint with a description of what changed
Each commit contains:
- All your files as they existed at that moment
- A unique ID (hash) like
a1b2c3d4... - Your name and email (the author)
- A timestamp (when it was created)
- A commit message describing what changed
- A reference to the previous commit (creating a chain of history)
Key insight: Commits don't store changes (diffs) - they store complete snapshots. Git is smart enough to only store what actually changed to save space.
git commit
Saves staged changes to the repository with a descriptive message:
git commit -m "Add user login functionality"
git commit -m "Fix navigation bug on mobile"
Best practices for commit messages:
- Use present tense ("Add feature" not "Added feature")
- Be specific and descriptive
- Keep the first line under 50 characters
- Explain what and why, not how
git restore
Undoes changes in your working directory:
git restore filename.txt        # Discard changes to a specific file
git restore .                   # Discard all changes in current directory
git restore --staged filename.txt  # Unstage a file (remove from staging area)
Use when: You want to throw away changes and go back to the last committed version.
git log
Shows the commit history:
git log                     # Full commit history
git log --oneline          # Condensed view (one line per commit)
git log --graph            # Shows branch structure visually
git log -n 5               # Show only last 5 commits
Example output:
commit a1b2c3d4e5f6789012345678901234567890abcd  ← This is the commit hash
Author: Jane Smith <[email protected]>
Date:   Mon Sep 29 14:30:22 2025 -0500

    Add user login functionality

    - Created login form component
    - Added authentication logic
    - Updated navigation to show user status

commit f9e8d7c6b5a4321098765432109876543210fedc  ← This is the commit hash
Author: John Doe <[email protected]>
Date:   Mon Sep 29 10:15:33 2025 -0500

    Fix navigation bug on mobile devices

commit 1a2b3c4d5e6f789012345678901234567890cdef  ← This is the commit hash
Author: Jane Smith <[email protected]>
Date:   Sun Sep 28 16:45:11 2025 -0500

    Initial project setup
The commit hash is the long string after "commit" - this is the unique ID you use with commands like git revert. You can use just the first 7-8 characters instead of the full hash:
git revert a1b2c3d4 # Revert the "Add user login functionality" commit
Important: Git log opens in a pager (like less). Press q to quit/exit when you're done viewing the history. You can also use arrow keys or Page Up/Down to navigate through long histories.
git revert
Creates a new commit that undoes a previous commit:
git revert <commit-hash> # Safely undo a specific commit
Use when: You need to undo a commit that's already been pushed/shared with others.
Retrieving and Uploading Changes
git fetch
Downloads updates from the remote repository without merging them into your current branch:
git fetch                   # Download updates from default remote (usually 'origin')
git fetch origin            # Download from specific remote
git fetch --all             # Download from all remotes
What it does:
- Updates your local knowledge of what's on the remote
- Downloads new commits, branches, and tags
- Does NOT change your working files - just updates references
- Safe to run anytime - won't break your current work
Use when: You want to see what others have done without affecting your current work.
git pull
Downloads updates from remote and merges them into your current branch:
git pull                    # Fetch and merge from default remote/branch
git pull origin main        # Pull from specific remote and branch
What it does:
- Combines
git fetch+git mergein one command - Downloads new commits AND applies them to your current branch
- May create merge conflicts if you have local changes
Important workflow:
git status                  # Check if you have uncommitted changes
git add .                   # Stage your changes if needed
git commit -m "Save work"   # Commit your changes first
git pull                    # Then pull remote changes
Use when: You want to get the latest changes and incorporate them into your work.
git push
Uploads your local commits to the remote repository:
git push                    # Push current branch to its remote counterpart
git push origin main        # Push main branch to origin remote
git push -u origin feature  # Push new branch and set upstream tracking
What it does:
- Sends your local commits to the remote repository
- Updates the remote branch with your changes
- Makes your work available to others
First time pushing a new branch:
git push -u origin branch-name # The -u sets up tracking for future pushes
Common workflow:
# 1. Make sure you're up to date
git pull

# 2. Make your changes
# ... edit files ...

# 3. Stage and commit
git add .
git commit -m "Implement new feature"

# 4. Push to remote
git push
Push will fail if:
- Someone else pushed changes since your last pull
- Solution:
git pullfirst, resolve any conflicts, thengit push
Branches
What are branches?
- Think of branches as parallel timelines for your project
- Each branch is an independent line of development
- You can work on different features simultaneously without interfering with each other
- The main branch (usually
mainormaster) contains the stable, working code
git branch
Manage branches in your repository:
git branch                  # List all local branches (* shows current branch)
git branch feature-login    # Create a new branch called "feature-login"
git branch -d feature-login # Delete a branch (safe - prevents deleting unmerged work)
git branch -D feature-login # Force delete a branch (dangerous - can lose work)
git branch -r              # List remote branches
git branch -a              # List all branches (local and remote)
git checkout
Switch between branches or restore files (older command):
git checkout main           # Switch to the main branch
git checkout feature-login  # Switch to feature-login branch
git checkout -b new-feature # Create AND switch to a new branch
git switch
Modern command for switching branches (Git 2.23+):
git switch main             # Switch to main branch
git switch feature-login    # Switch to feature-login branch
git switch -c new-feature   # Create AND switch to a new branch
Branch workflow example:
git switch main             # Start from main branch
git pull                    # Get latest changes
git switch -c add-navbar    # Create new branch for navbar feature
# ... make changes to files ...
git add .
git commit -m "Add responsive navigation bar"
git switch main             # Switch back to main
git merge add-navbar        # Merge your feature into main
Why use branches?
- Isolation: Work on features without breaking main code
- Collaboration: Team members can work on different features simultaneously
- Experimentation: Try new ideas without risk
- Clean history: Organize commits by feature or task
Merging
git merge
Combines changes from one branch into another branch:
git merge feature-branch    # Merge feature-branch into current branch
git merge origin/main       # Merge remote main branch into current branch
How merging works:
- Switch to the branch you want to merge INTO (usually
main) - Run
git mergewith the branch you want to merge FROM - Git combines the changes from both branches
Complete merge workflow:
# 1. Switch to main branch
git switch main

# 2. Make sure main is up to date
git pull

# 3. Merge your feature branch
git merge feature-login

# 4. Push the merged changes
git push

# 5. Delete the feature branch (optional but recommended)
git branch -d feature-login
Types of Merges
Fast-Forward Merge:
- Happens when the target branch hasn't changed since you created your branch
- Git simply moves the branch pointer forward
- No merge commit is created
- Clean, linear history
Three-Way Merge:
- Happens when both branches have new commits
- Git creates a new "merge commit" that combines both histories
- Shows that a merge occurred in the history
Merge Conflicts
What causes conflicts:
- Two branches modify the same line in the same file
- One branch deletes a file while another modifies it
- Git can't automatically decide which change to keep
When conflicts occur:
git merge feature-branch
# Output: CONFLICT (content): Merge conflict in file.js
# Automatic merge failed; fix conflicts and then commit the result.
Resolving conflicts:
- Open the conflicted file - Git marks conflicts like this:
function greetUser() {
<<<<<<< HEAD
    return "Hello, User!";
=======
    return "Welcome, User!";
>>>>>>> feature-branch
}
- Edit the file to keep what you want:
function greetUser() {
    return "Welcome, User!";  // Chose the version from feature-branch
}
- Stage and commit the resolved file:
git add file.js
git commit -m "Resolve merge conflict in greetUser function"
Merge Best Practices
- Always merge INTO main, not FROM main
- Pull latest changes before merging
- Test your code after merging
- Delete feature branches after successful merge
- Use descriptive commit messages for merge commits
- Communicate with team during conflicts
Alternative: Pull Requests
Instead of merging locally, many teams use Pull Requests on GitHub:
- Propose merging one branch into another
- Allow code review before merging
- Provide discussion space for changes
- Can be merged with a button click on GitHub
- Safer for team collaboration
Hackathon Collaboration Best Practices
-
Commit Often
Save your work frequently with meaningful commit messages. -
Pull Before You Push
Always update your local repo before pushing changes to avoid conflicts. -
Use Feature Branches
- Create a branch for each task or feature.
- Keep
mainormasterstable.
-
Communicate Changes
- Let your team know what you are working on.
- Use GitHub Issues, comments, or chat for updates.
-
Review Pull Requests Quickly
- Check teammate code for mistakes or conflicts.
- Merge only after verifying it works.
-
Keep Branches Small
- Focus on one feature or fix at a time.
- Smaller branches are easier to merge during the hackathon.
-
Use .gitignore
- Avoid committing temporary files or dependencies.
- Keeps the repo clean and reduces conflicts.
-
Resolve Conflicts Carefully
- Communicate with teammates when conflicts arise.
- Test after resolving to make sure everything works.